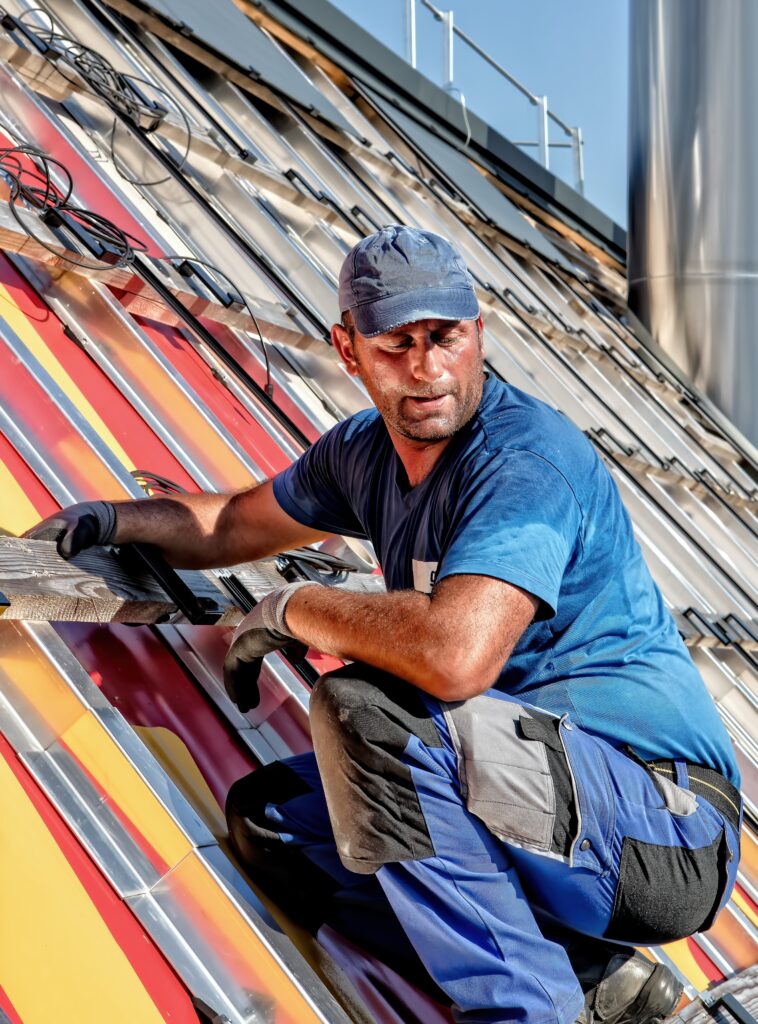
Regular maintenance for LED video walls is of utmost importance to ensure optimal performance and longevity and to avoid costly repairs. LED video walls are sophisticated display systems that require proper care, upkeep, and adherence to best practices.
Maintaining LED video walls involves various activities, including cleaning, troubleshooting, repair, and software updates. Routine cleaning is crucial to remove dust, fingerprints, and other debris that can affect the clarity and brightness of the display. Cleaning the video wall screens regularly using appropriate techniques and cleaning solutions is recommended.
By implementing proper care, regular upkeep, and adhering to best practices, you can enjoy a visually stunning and reliable video wall experience. A video wall maintenance checklist can help cover all necessary steps.
Remember, preventive maintenance and routine care are more cost-effective than extensive repairs or premature replacement.
LED video wall maintenance checklist
Maintaining an LED video wall is crucial for optimal performance, longevity, and visual impact. Regular upkeep ensures that your video wall delivers stunning visuals and seamless operation. By following a comprehensive maintenance checklist, you can effectively care for your LED video wall, prevent issues, and maximise its lifespan.
- Cleaning:
- Clean the LED video wall regularly using a non-abrasive microfiber cloth to remove dust, fingerprints, and smudges.
- Use a mild cleaning solution specifically designed for electronic displays. Avoid using harsh chemicals or abrasive materials.
- Pay extra attention to the areas around the bezels and vents to prevent dust accumulation.
- Software Updates:
- Regularly check for software updates provided by the manufacturer or supplier.
- Install the latest firmware updates to ensure optimal performance, improved features, and compatibility with new technologies.
- Follow the manufacturer’s instructions for updating the software to avoid potential issues.
- Component Inspection:
- Inspect the video wall components, including LED panels, power supplies, cables, and connectors.
- Look for any signs of physical damage, loose connections, or malfunctioning components.
- Replace damaged or faulty components promptly to prevent further issues.
- Calibration:
- Perform regular calibration to maintain accurate colour reproduction and brightness uniformity across the video wall.
- Use calibration tools the manufacturer provides or seek professional assistance for precise adjustments.
- Follow the recommended calibration schedule and guidelines provided by the manufacturer.
- Diagnostics:
- Utilise diagnostic tools or software to monitor the performance and health of your LED video wall.
- Monitor parameters such as temperature, voltage, and signal quality to detect abnormalities.
- Regularly check the system logs for error messages or warnings that may indicate underlying issues.
- Optimisation:
- Optimise the video wall settings based on the viewing environment and content, such as brightness, contrast, and colour temperature.
- Adjust the settings to achieve the desired visual quality and energy efficiency.
- Consult the manufacturer’s documentation for recommended optimisation practices.
| Maintenance Task | Frequency |
| Cleaning | Weekly |
| Software Updates | Biannually |
| Component Inspection | Quarterly |
| Calibration | Annually |
| Diagnostics | Monthly |
| Optimisation | As needed |
Quick video wall maintenance tips
Maintaining an LED video wall is crucial for optimal performance and longevity. Regular care, upkeep, and troubleshooting play a significant role in ensuring a seamless viewing experience.
Regular Cleaning for Enhanced Display Quality
To maintain the visual integrity of your LED video wall, it is essential to clean it regularly. Follow these cleaning tips:
- Use a microfiber or non-abrasive, lint-free cloth to wipe the screen gently.
- Avoid harsh chemicals or abrasive cleaners that could damage the screen’s surface.
- If necessary, lightly dampen the cloth with water and mild soap for stubborn stains.
- Clean the entire video wall, paying attention to edges and corners.
- Perform cleaning when the video wall is turned off to avoid interference.
Optimise Performance with Software Updates
Software updates are vital for improving performance, addressing potential bugs, and adding new features to your LED video wall. Follow these steps to ensure effective software management:
- Stay updated with the latest software releases from the manufacturer.
- Regularly check for firmware updates specific to your video wall model.
- Before updating, back up all video wall configurations and settings.
- Follow the manufacturer’s instructions to install the software updates correctly.
- Test the video wall thoroughly after the update to ensure everything functions correctly.
Component Replacement and Calibration
Over time, certain video wall components may require replacement or calibration to maintain optimal performance. Consider the following tips:
- Keep a record of the video wall components, including their installation dates.
- Monitor the performance of individual LED panels for signs of deterioration.
- Replace malfunctioning panels promptly to prevent further damage.
- Consult the manufacturer’s guidelines for proper calibration procedures.
- Regularly calibrate colour, brightness, and contrast settings for consistent display quality.
Streamline Maintenance with Diagnostic Tools
Efficient video wall maintenance involves utilising time-saving techniques and tools. Consider the following:
- Employ diagnostic software provided by the manufacturer to monitor the video wall’s health.
- Utilise remote monitoring tools to detect and address potential issues promptly.
- Keep spare parts on hand to reduce downtime during component replacements.
- Maintain a maintenance log to track service history and identify recurring issues.
- Collaborate with a certified video wall service provider for complex maintenance tasks.
Incorporate Preventive Maintenance
To minimise unexpected breakdowns and extend the lifespan of your LED video wall, incorporate these preventive measures:
- Follow a regular maintenance schedule, including cleaning, software updates, and inspections.
- Conduct routine checks for loose connections, damaged cables, or unusual noises.
- Implement a cooling system to prevent overheating, especially in confined installations.
- Train staff on proper video wall operation and handling to avoid accidental damage.
- Consider professional video wall maintenance services for comprehensive care.
Easy LED video wall upkeep
Proper maintenance ensures your LED video wall’s longevity and optimal performance. Following straightforward methods, you can keep your video wall in good condition, prevent issues, and maximise lifespan.
Significance of Proper Ventilation, Temperature Control, and Dust Prevention
Maintaining a suitable environment for your LED video wall is essential. Adequate ventilation prevents the accumulation of heat, which can negatively impact the performance and lifespan of the display. Ensure the video wall is installed in a well-ventilated area, allowing for proper airflow around the panels.
Temperature control is another crucial aspect. Extreme temperatures can affect the functionality of LED video walls. Avoid exposing the video wall to excessive heat or cold, leading to screen damage and other issues. Keep the room temperature within the recommended range specified by the manufacturer.
Dust prevention is vital for the optimal performance of LED video walls. Dust particles can accumulate on the panels and reduce the brightness and clarity of the display over time. Regularly clean the area around the video wall and use air filters or air purifiers to minimise dust. Additionally, consider installing a protective cover or enclosure to shield the video wall from dust and other contaminants.
Basic Cleaning Procedures and Guidelines for Safe Handling
Cleaning your LED video wall is a crucial part of maintenance. However, it is essential to follow the proper procedures to avoid causing damage. Here are some basic cleaning instructions and guidelines for safe handling:
- Turn off the video wall: Before cleaning, ensure that the video wall is turned off and disconnected from the power source.
- Use a soft, lint-free cloth: Gently wipe the surface of the LED panels using a soft, lint-free cloth. Avoid using abrasive materials or harsh chemicals, which can scratch or damage the screen.
- Mild cleaning solution: Use a mild cleaning solution specifically designed for electronic displays. Apply the solution to the cloth, not directly on the panels, and wipe gently in a circular motion.
- Don’t apply excessive pressure: While cleaning, do not apply excessive pressure to the panels. Too much pressure can lead to pixel damage or malfunction.
- Safe handling: When handling the video wall, be cautious to prevent accidental drops or impact. Follow the manufacturer’s instructions for safe handling and transportation.
DIY video wall maintenance
Maintaining a video wall is crucial to ensure its longevity, performance, and overall user experience. By implementing the right maintenance techniques, you can keep your LED video wall running smoothly and extend its lifespan.
Video Wall Cleaning Methods
Proper cleaning is essential for maintaining your LED video wall’s clarity and visual impact. Here are some DIY cleaning techniques you can employ:
- Regular Dusting: Use a soft, lint-free cloth or a microfiber duster to remove dust particles from the video wall surface. Gently wipe the screen in a vertical or horizontal motion to avoid scratching.
- Gentle Cleaning Solution: For stubborn smudges or fingerprints, mix a mild cleaning solution using equal parts of distilled water and isopropyl alcohol. Dampen a clean cloth with the solution and wipe the affected areas gently.
- Avoid Harsh Chemicals: Never use abrasive cleaners, solvents, or ammonia-based products, as they can damage the protective coating of the video wall. Stick to gentle, non-abrasive cleaning agents.
Component Replacement and Troubleshooting Tips
DIY troubleshooting and component replacement can save time and money when faced with technical issues or faulty components. However, it is crucial to exercise caution and have a basic understanding of the video wall system. Here are some tips to guide you:
- Identify the Problem: Before attempting any repairs, diagnose the issue accurately. Look for error messages, unusual display behaviour, or malfunctioning components. Consult the user manual or contact the manufacturer for troubleshooting guidance.
- Power Cycle the Video Wall: Often, minor glitches can be resolved by power cycling the system. Turn off the video wall, unplug all power cords, wait a few minutes, and then plug them back in. Power on the video wall and check if the problem persists.
- Component Replacement: If you have identified a faulty component, such as an LED panel or a video controller, consult the manufacturer’s guidelines for replacing the component. Follow the recommended steps carefully to ensure proper installation.
When to Attempt DIY Maintenance and When to Seek Professional Assistance
While DIY maintenance can be cost-effective and rewarding, some require professional intervention. Consider the following factors to determine when to attempt DIY maintenance and when to seek expert help:
- Warranty Considerations: If your video wall is still under warranty, attempting DIY repairs or maintenance might void the warranty. Check the terms and conditions of your warranty agreement before performing any maintenance tasks.
- Complexity of the Issue: Technical issues, such as intricate wiring problems or advanced software troubleshooting, are best left to experienced professionals. DIY attempts can worsen the problem or cause further damage in such cases.
- Lack of Expertise: If you are still getting familiar with the video wall system, its components, or the necessary maintenance procedures, it is advisable to consult professionals. They possess the expertise and specialised tools required for efficient maintenance and repairs.
Common video wall maintenance mistakes to avoid
When it comes to LED video wall maintenance, one of the most common mistakes users unknowingly make is improper handling. Video walls are delicate and sensitive devices, and mishandling them can lead to significant damage. Avoid placing excessive pressure on the LED panels or using sharp objects to clean the screen, as this can cause scratches or even permanent pixel damage. Instead, use a soft, lint-free cloth and gentle cleaning solutions specifically designed for display screens. Remember, a little extra care during handling can go a long way in preserving the longevity and performance of your LED video wall.
Neglecting Software Updates
Another critical aspect of LED video wall maintenance is keeping the software current. Software updates often include bug fixes, performance enhancements, and security patches that help optimise the functionality of your video wall. Neglecting these updates can lead to compatibility issues, system glitches, and security vulnerabilities. Make it a habit to check for software updates regularly the manufacturer provides and promptly install them. This practice ensures that your video wall operates smoothly and efficiently, providing the best viewing experience for your audience.
Overlooking Calibration
Calibration is an essential step in maintaining the optimal performance of an LED video wall. Overlooking calibration can result in uneven brightness, colour inconsistencies, and poor image quality. Regularly calibrating your video wall helps to ensure uniformity across all panels, accurate colour reproduction, and optimal brightness levels. Consult the manufacturer’s guidelines or seek professional assistance to perform calibration procedures accurately. By giving calibration the attention it deserves, you can enhance the visual experience and extend the lifespan of your LED video wall.
Guidance on Avoiding Mistakes
To avoid these common video wall maintenance mistakes and their potential consequences, follow these practical tips:
- Handle with care: Always be gentle when cleaning or moving your LED video wall. Use appropriate cleaning solutions and soft cloths to prevent damage to the panels.
- Stay updated: Regularly check for software updates from the manufacturer and install them promptly to ensure optimal performance, security, and compatibility.
- Prioritise calibration: Make calibration a part of your routine maintenance schedule. Proper calibration guarantees consistent image quality and colour accuracy across the video wall.
- Follow best practices: Familiarise yourself with video wall maintenance best practices recommended by industry experts and manufacturers. These guidelines will help you establish effective routines and avoid unnecessary mistakes.
- Perform regular inspections: Conduct routine visual inspections to identify any signs of damage or abnormalities. Early detection allows for timely repairs and prevents issues from escalating.
- Consider professional services: If you lack the expertise or resources, consider hiring professional video wall service providers for comprehensive maintenance, troubleshooting, and repairs.
Remember, investing time and effort in proper LED video wall maintenance not only enhances the performance and longevity of your display but also ensures a seamless viewing experience for your audience. You can optimise your video wall’s functionality and extend its lifespan by avoiding common maintenance mistakes and following recommended practices.
Cost-effective video wall servicing
Maintaining an LED video wall is crucial to ensure optimal performance, longevity, and overall user experience. By adopting cost-effective strategies for video wall care, upkeep, and troubleshooting, you can maximise the value of your resources without compromising quality.
Prioritising Maintenance Tasks: Maximizing Resource Value
To effectively prioritise maintenance tasks and make the most of your resources, it is important to identify the critical areas that require attention. By following a systematic approach, you can ensure your LED video wall’s longevity and peak performance. Here’s a step-by-step guide to help you:
- Regular Cleaning and Upkeep: Routine cleaning of your video wall is essential to maintain its visual appeal and performance. Dust and dirt accumulation can affect image quality and hinder optimal functioning. Utilise mild cleaning solutions and non-abrasive microfiber cloths to gently clean the LED panels, ensuring you follow the manufacturer’s recommendations. Regular cleaning enhances the video wall’s aesthetics and prevents potential issues in the long run.
- Troubleshooting and Repair: Promptly addressing video wall issues is crucial to prevent further damage and minimise repair costs. Familiarise yourself with common video wall problems such as pixelation, colour inconsistencies, or flickering. Troubleshooting techniques like power cycling, checking cable connections, and adjusting display settings can often resolve minor issues. For more complex problems, consult the manufacturer’s documentation or consider professional repair services specialising in LED video walls.
- Software Updates and Calibration: Keeping your video wall’s software up to date is vital for optimal performance and security. Manufacturers regularly release software updates that address bugs, improve functionality, and introduce new features. Additionally, periodic calibration ensures colour accuracy and uniformity across the video wall. Consult the manufacturer’s guidelines for software updates and consider professional calibration services to achieve the best possible image quality.
- Component Replacement: Over time, certain components of your LED video wall may require replacement to maintain its performance. Instead of opting for costly full panel replacements, consider a component-level approach. Identify faulty or underperforming components and consult with specialised technicians or manufacturers to source and replace individual parts. This targeted approach can significantly reduce expenses while ensuring optimal video wall functionality.
Budget-Friendly Options for Video Wall Maintenance
Maintaining your LED video wall on a budget doesn’t mean compromising quality. You can achieve optimal results without breaking the bank by exploring cost-effective component upgrades, cleaning supplies, and professional services options. Here are some recommendations:
- Component Upgrades: Explore OEM (original equipment manufacturer) and third-party options when considering component upgrades. Third-party components can sometimes offer comparable quality at a lower price point. However, ensure compatibility and quality assurance by consulting with experts or referring to trusted sources within the industry.
- Cleaning Supplies: Opt for cost-effective yet reliable cleaning supplies to keep your video wall in top condition. Microfiber cloths, screen cleaning solutions, and compressed air can be purchased in bulk or from reputable suppliers to reduce costs. Avoid harsh chemicals or abrasive materials that can damage delicate LED panels.
- Professional Services: While professional services can add to maintenance costs, they can save time and effort. Research and compare service providers specialising in LED video wall maintenance. Request multiple quotes, review customer testimonials, and assess their expertise and experience. Choosing a reputable service provider who offers competitive pricing can provide valuable assistance while staying within your budget.
Troubleshooting LED video wall issues and optimisation
LED video walls have become increasingly popular in various industries, offering captivating visual displays and engaging content. Regular maintenance and troubleshooting are crucial to ensure their longevity and optimal performance.
Common Issues and Troubleshooting Techniques
LED video walls may encounter several common issues that can impact their performance. Here are some of the most prevalent issues and troubleshooting techniques:
- Display Irregularities
- Problem: Dead pixels, colour inconsistencies, or flickering.
- Troubleshooting: Inspect and replace faulty LED panels. Use specialised software for pixel calibration. Ensure proper power and signal connections.
- Image Misalignment
- Problem: Misaligned content across the video wall.
- Troubleshooting: Adjust the positioning and alignment of individual panels. Utilise image alignment tools for precise adjustments.
- Uneven Brightness
- Problem: Variation in brightness levels across the video wall.
- Troubleshooting: Calibrate the panels uniformly using calibration software. Adjust the brightness settings on individual panels to achieve consistency.
- Image Tearing or Lag
- Problem: Tearing or lagging of content during fast-paced video playback.
- Troubleshooting: Update graphics drivers and video wall controller firmware. Optimise video wall settings for smoother content rendering.
- Overheating
- Problem: Excessive heat generated by the video wall.
- Troubleshooting: Ensure proper ventilation and airflow around the video wall—clean dust and debris regularly from fans and cooling systems. Monitor temperature levels using dedicated sensors.
Diagnosing and resolving software, hardware, and connectivity issues
- Software-related Issues
- Problem: Software crashes, compatibility issues, or firmware errors.
- Troubleshooting: Keep the video wall’s software and firmware up to date. Install reliable antivirus software to prevent malware or viruses. Troubleshoot software conflicts and compatibility issues.
- Hardware-related Issues
- Problem: Faulty components, loose connections, or power supply problems.
- Troubleshooting: Regularly inspect and tighten all connections. Replace damaged or worn-out components promptly. Monitor power supply stability and voltage levels.
- Connectivity Issues
- Problem: Signal loss, intermittent connections, or synchronisation problems.
- Troubleshooting: Check cable integrity and connections. Replace damaged or inadequate cables. Ensure proper signal distribution and synchronisation among video wall components.
Optimising Video Wall Settings for Enhanced Performance
To maximise the performance of your LED video wall, consider the following optimisation tips:
- Colour Calibration
- Use calibration software to achieve accurate colour representation and consistency across the video wall. Regularly calibrate the panels to maintain optimal colour balance.
- Brightness and Contrast Adjustment
- Adjust brightness and contrast levels to match the viewing environment. Avoid excessively high brightness, which can cause image degradation and reduce panel lifespan.
- Content Scheduling
- Implement a content scheduling system to prevent static images from causing image retention or burn-in. Display dynamic content and incorporate screen savers during idle periods.
- Energy Efficiency
- Enable power-saving features when the video wall is not in use. Utilise ambient light sensors to adjust brightness levels automatically based on the surrounding lighting conditions.
- Regular Cleaning
- Follow a routine cleaning schedule to remove dust, fingerprints, and debris from the LED panels. Use recommended cleaning solutions and non-abrasive materials to avoid damaging the panels.
- Preventive Maintenance
- Conduct regular inspections to identify potential issues before they escalate. Create a maintenance checklist to ensure all necessary tasks are performed regularly, such as software updates, component replacements, and calibration.
Conclusion
Regular LED video wall maintenance is crucial for optimal performance and longevity. You can keep your video walls in shape by implementing this article’s tips and best practices. Proper care, upkeep, and cleaning are essential to ensure their longevity. Routine maintenance should include troubleshooting, repair, and component replacement when necessary. Regular calibration and diagnostics help maintain video wall performance.
Additionally, staying updated with software and firmware updates is crucial. Pay attention to the importance of video wall maintenance, as it preserves their performance and extends their lifespan. Follow our LED video wall maintenance checklist and optimise your video walls for long-lasting and superior display quality.
FAQs
How often should I clean my LED video wall?
The frequency of cleaning your LED video wall depends on various factors such as the environment, usage, and level of dirt accumulation. As a general guideline, cleaning the video wall at least once every three months is recommended. However, more frequent cleaning may be necessary in dusty or high-traffic areas. Regularly inspect the video wall for visible dust, smudges, or debris and clean as needed. Additionally, consider scheduling professional cleaning annually for comprehensive maintenance.
What are some common video wall issues?
Common video wall issues include dead pixels (non-functioning or stuck pixels), non-uniform brightness or colour calibration, image tearing or artefacts, power supply failures, overheating, and connectivity problems. These issues can arise due to manufacturing defects, improper installation, environmental factors, or software glitches. Prompt troubleshooting and maintenance are essential to address these issues effectively.
How can I troubleshoot LED video wall problems?
When troubleshooting LED video wall problems, check the power connections, cables, and signal sources for any loose or faulty connections. Ensure that the video wall controller and software settings are configured correctly. If you encounter image quality issues, verify the calibration and colour settings. Address overheating concerns by checking ventilation and cooling systems. For persistent issues, consult the user manual or the manufacturer’s technical support for guidance.
Are there any tips for extending the lifespan of my video wall?
To extend the lifespan of your video wall, implement the following tips:
- Maintain proper ventilation and cooling to prevent overheating.
- Avoid exposing the video wall to extreme temperatures or humidity.
- Operate the video wall within the recommended brightness and contrast levels.
- Minimise static images and screen burn-in by utilising screensavers or periodic content changes.
- Handle the display panels with care, avoiding physical impact or pressure.
- Follow manufacturer guidelines for cleaning and maintenance procedures.
- Consider professional calibration and regular inspections to identify and address potential issues promptly.
What are the best practices for LED video wall maintenance?
The best practices for LED video wall maintenance include the following:
- Regularly clean the screens using manufacturer-approved cleaning solutions and soft microfiber cloths.
- Conduct visual inspections to identify any visible damage, dead pixels, or anomalies.
- Schedule professional maintenance at least once a year for a thorough cleaning, calibration, and technical assessments.
- Keep the video wall environment dust-free and maintain proper ventilation.
- Adhere to recommended usage guidelines, such as operating within the specified temperature and humidity ranges.
- Update firmware and software regularly to ensure compatibility and access to the latest features.
- Follow manufacturer guidelines for power cycling and shutdown procedures.
How much does video wall maintenance cost?
The cost of video wall maintenance can vary depending on several factors, including the size and complexity of the video wall, the type of maintenance required, the location, and the service provider. Routine cleaning and maintenance costs can range from a few hundred to a few thousand dollars annually. Additional expenses for repairs, component replacements, or software updates may be incurred. Obtaining quotes or contacting professional service providers is advisable to get accurate cost estimates tailored to your specific video wall setup and maintenance needs.
Can I repair my video wall on my own?
Repairing a video wall on your own can be challenging and risky, especially if you need more technical expertise or experience with electronics. LED video walls are intricate systems, and attempting repairs without proper knowledge can cause further damage. It is recommended to consult the manufacturer’s support documentation or contact their technical support for guidance. It is often best to rely on professional technicians specialising in video wall repairs to ensure the issue is correctly diagnosed and resolved.
Do I need to calibrate my video wall regularly?
Regular calibration is crucial to maintain optimal performance and visual consistency across the video wall. Age, environmental conditions, and usage patterns can impact colour accuracy, brightness uniformity, and overall image quality. Calibration ensures that each display panel is adjusted to match a standardised colour and brightness profile, creating a seamless visual experience. The calibration frequency may vary based on the specific requirements of your video wall and the manufacturer’s recommendations. However, it is generally advisable to calibrate at least once a year or whenever significant changes in visual quality are observed.
How do software updates affect video wall performance?
Software updates can significantly impact video wall performance by introducing bug fixes, security enhancements, and new features. Updates often address compatibility issues, improve stability, and optimise resource utilisation, leading to smoother operation and reduced downtime. Updating the video wall’s firmware and software ensures compatibility with the latest media formats and technologies. However, it is important to test software updates before deploying them on a live video wall and ensure compatibility with your specific hardware and configurations. Monitoring manufacturer release notes and consulting technical support can provide valuable guidance on software updates that may positively impact your video wall’s performance.
When should I replace the video wall components?
The need to replace video wall components depends on several factors, including the age of the components, technological advancements, performance degradation, and repair costs. As technology advances, newer components may offer better features, improved energy efficiency, or enhanced visual quality. If the video wall experiences persistent issues despite maintenance efforts or the cost of repairs outweighs the value, consider a component replacement. Regular assessments of the video wall’s performance, discussions with technical experts, and evaluating the availability of replacement parts can help determine the optimal time for component replacement.
How can I optimise my LED video wall settings?
To optimise LED video wall settings, follow these recommendations:
- Adjust brightness and contrast levels to match the viewing environment and content requirements, ensuring a comfortable and vivid viewing experience.
- Configure colour settings and calibration profiles to achieve consistent colour accuracy and uniformity across the video wall.
- Optimise video playback settings and codecs to ensure smooth and high-quality playback.
- Fine-tune image scaling and aspect ratio settings for optimal content presentation.
- Enable power-saving features, such as automatic dimming or sleep mode, during inactivity to conserve energy.
- Customise on-screen display settings, such as bezel compensation or image positioning, to align the video wall panels seamlessly.
- Regularly review and adjust settings based on user feedback and changes in content requirements.
What are the signs of video wall damage?
Signs of video wall damage may include:
- Dead or stuck pixels: Individual pixels remain permanently off or display incorrect colours.
- Non-uniform brightness or colour calibration: Visible variations in brightness or colour across the video wall.
- Image artefacts or tearing: Visual anomalies such as distortion, flickering, or tearing of displayed content.
- Overheating: Excessive heat emitted from the video wall, accompanied by abnormal fan noise or automatic shutdowns.
- Connectivity issues: Unstable or intermittent connections between video wall components or external sources.
- Power supply failures: Complete loss of power or erratic behaviour of the video wall due to faulty power supply units.
- Physical damage: Cracks, dents, or other visible damage to the display panels or structural components.
Can I hire professional services for video wall maintenance?
Yes, hiring professional services for video wall maintenance is highly recommended. Professional technicians have the expertise, experience, and specialised tools required to perform comprehensive maintenance, cleaning, calibration, and troubleshooting. They can identify and address potential issues before they escalate, minimising downtime and maximising the lifespan of your video wall. Additionally, professional services often offer tailored maintenance plans, regular inspections, and access to genuine replacement parts, ensuring optimal performance and adherence to manufacturer guidelines. Contact reputable AV integrators, service providers, or the manufacturer’s authorised service centres to inquire about professional video wall maintenance options in your area.
What is the process for cleaning a video wall?
The process of cleaning a video wall typically involves the following steps:
- Turn off the video wall and disconnect it from the power source.
- Gently remove any visible dust or debris from the surface using a clean, dry, and lint-free microfiber cloth.
- Prepare a mixture of mild, non-abrasive cleaning solution and water following the manufacturer’s recommendations.
- Dampen a separate microfiber cloth with the cleaning solution, ensuring it is not excessively wet.
- Starting from the top corner, gently wipe each display panel using horizontal or vertical strokes.
- Pay attention to any stubborn stains or smudges, applying slightly more pressure if necessary.
- Allow the panels to air dry, or use a dry microfiber cloth to remove excess moisture.
- Reconnect the video wall to the power source and turn it on, verifying everything functions properly.
Note: Following the manufacturer’s specific cleaning instructions is essential, and avoiding using harsh chemicals or abrasive materials that may damage the video wall.
How can I improve the performance of my video wall?
To improve the performance of your video wall, consider the following tips:
- Optimise content resolution and formats to match the native resolution of the video wall.
- Utilise high-quality media sources and ensure proper encoding to minimise artefacts and maximise visual quality.
- Employ efficient video compression techniques to reduce bandwidth requirements without sacrificing quality.
- Implement video wall management software for centralised control, scheduling, and content distribution.
- Regularly update firmware and software to access the latest features, bug fixes, and performance enhancements.
- Optimise network connectivity to ensure smooth content playback and real-time updates.
- Conduct periodic calibration to maintain colour accuracy and brightness uniformity.
- Regularly monitor and manage the video wall’s operating temperature, ensuring proper ventilation and cooling.
- Consider professional integration and consultation services to ensure optimal hardware configuration and performance.